
International Punch Needle Rug Hooking Day falls on March 7, 2026, the first Saturday of March. It’s a day eagerly anticipated by fiber artists, rug makers, and textile craft lovers around the world. Here’s the best part: it’s a day where you can punch and not be punished! In fact, every punch is rewarded with rows of plush loops and textured delight. Instead of getting into trouble, you’ll end up with something beautiful for your home, a gift for a loved one and the satisfaction of something handmade. Honestly, how many hobbies let you “punch” repeatedly and call it relaxing? This special day celebrates the joy of punch needle rug hooking, a creative craft that beautifully blends traditional rug-making heritage with modern crafting accessibility.
Whether you’re a seasoned rug hooker or curious about punch needle rug hooking for beginners, this global celebration is the perfect excuse to slow down, pick up your punch needle tool, and create something meaningful.
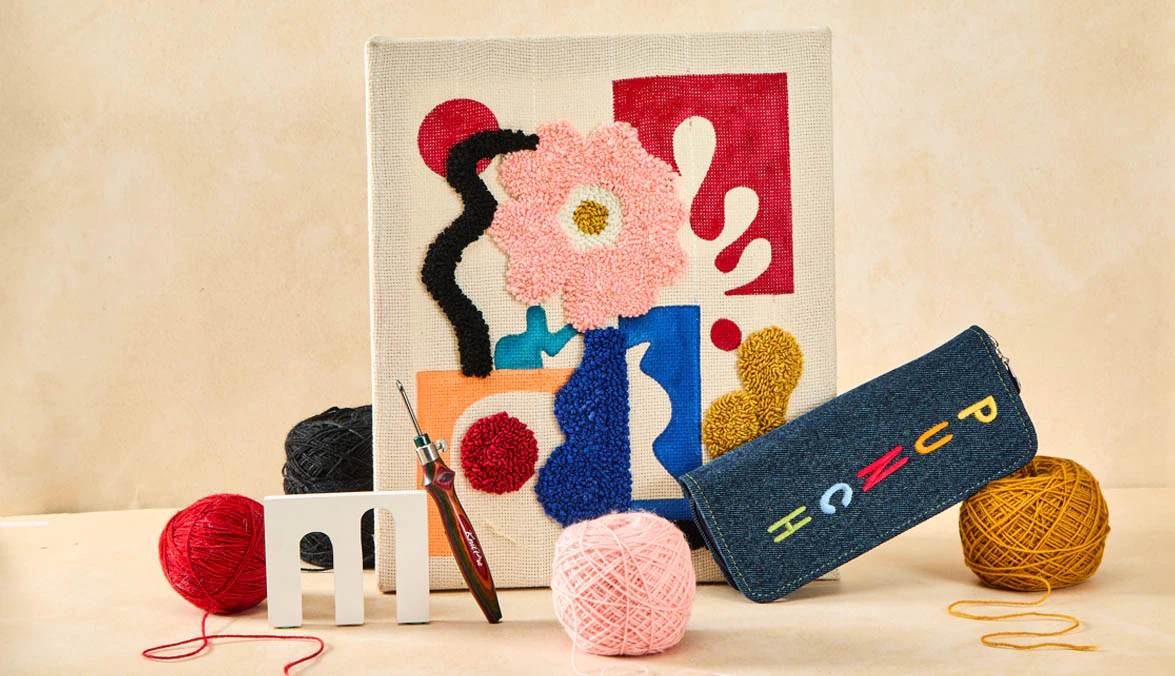
What Is Punch Needle Rug Hooking?
Punch needle rug hooking is a popular textile craft evolved from traditional rug hooking, where yarn is punched through a stretched fabric foundation to form loops that create plush, textured designs. Punch needle art, also known as punch needle embroidery uses a hollow punch needle tool, crafters push yarn through fabrics like monk’s cloth or weaver’s cloth. The loops form on the opposite side of the fabric, creating the soft pile that gives punch needle rugs their signature cozy texture and dimensional look.
The technique is incredibly versatile and can be used to create:
- Handmade rugs and mats
- Textured wall hangings
- Decorative cushions and pillows
- Bags, coasters, and home décor pieces
Because it’s rhythmic and repetitive, punch needle is also known as a relaxing, mindful fiber art, making it perfect for stress relief and creative self-care.
Punch Needle vs Traditional Rug Hooking
Many beginners searching for “punch needle vs traditional rug hooking” wonder how these two techniques differ.
Traditional rug hooking uses a hook tool to pull strips of wool fabric or yarn through a backing material such as burlap or linen.
- Work is done from the front side of the rug
- Each loop is pulled individually
- Often creates chunky, primitive-style designs
- Requires preparation like cutting wool strips
Traditional rug hooking is beloved for its heritage folk-art aesthetic and bold textures.
Punch needle rug hooking takes a slightly different approach.
Instead of pulling loops, the maker pushes yarn through the fabric using a hollow punch needle tool. The loops appear on the opposite side and become the finished design once the piece is flipped.
Key benefits include:
- Faster filling of large areas
- Adjustable loop heights for varied textures
- No knots required—the fabric tension holds loops in place
- Ideal for yarn-based projects instead of fabric strips
For modern makers searching for easy rug hooking techniques for beginners, punch needle is often the more approachable option.
How to Start Punch Needle Rug Hooking for Beginners
If you’re inspired to celebrate International Punch Needle Rug Hooking Day 2026, getting started is easier than you might think.
1. Gather Essential Punch Needle Supplies
You’ll need a few basic tools to begin your punch needle journey:
Choose a punch needle - Choose the right hollow punch needle tool. Tools like KnitPro punch needle sets are especially beginner-friendly. thanks to their ergonomic wooden handles and adjustable loop settings. The interchangeable needle tips allow working with different loop lengths for different textures.
Foundation fabric - Monk’s cloth is the most popular choice because its weave securely holds punch needle loops. However, you can also explore which fabric is the best for your punch needle art project.
Yarn - Worsted-weight or bulky yarn works best for punch needle rugs. Wool or acrylic blends provide durability and texture.
Frame or embroidery hoop - Your fabric must stay tightly stretched. Small projects work well in embroidery hoops, while larger rugs benefit from wooden rug frames.
Additional tools
- Sharp scissors
- Marker for tracing designs
- Optional rug binding or backing fabric
2. Prepare Your Workspace
Stretch the monk’s cloth tightly across your hoop or frame, it should feel like a drum when tapped. Draw or trace your pattern onto the back side of the fabric, since the punch needle is worked from the back. Remember to reverse lettering or directional designs so they appear correctly when flipped. You can also experiment with exploring the topic of which side of the foundation fabric to punch.
3. Thread the Punch Needle and Start Punching
Thread the yarn through the needle’s channel and eye. Here’s our complete guide on how to thread the Punch Needle.
Getting Started for Beginners
If you’re new to the craft, these tips will make the learning process smoother:
- Start with small punch needle projects like coasters or mini wall hangings
- Keep your fabric tight at all times
- Space punches evenly so loops touch but don’t overlap
- Experiment with different loop heights to add depth and texture
Also Read: 5 Common Punch Needle Art Mistakes and How to Fix Them
Celebrate International Punch Needle Rug Hooking Day
On March 7, 2026, join fiber artists across the globe in celebrating International Punch Needle Rug Hooking Day. Share your work online, join virtual punch-along sessions, or simply spend a relaxing afternoon creating something beautiful. With tools like KnitPro punch needle sets, even beginners can quickly fall in love with this tactile, creative craft.
After all, punch needle rug hooking is about embracing creativity and enjoying the soothing rhythm of one loop at a time.
Happy Punching!


